Notably, I am not a fan of planning because I believe your garden should evolve organically and reflect the seasons and your moods. For those blog readers who may be new to container gardening, I’ve included the following overview which will see you through to a successful planting and a garden design to soothe and invite you.
Planning and Design:
Here is the advice or guideline that I refer to as "The Rule". You will find this rule over and over on the web, gardening blogs, YouTube, gardening books, etc.
You need a Thriller, Filler and Spiller to make beautiful container gardens. This guideline gives you a 3-D effect by offering 3 levels of plants to every container. These three levels will give a “lush look” to your container gardening.
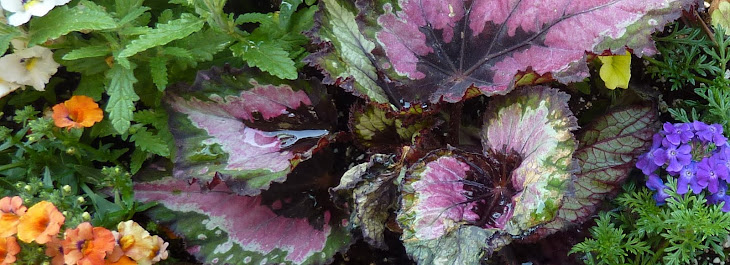
• Thriller adds the height. This could be tall, or leafy, or substantial. Look for a plant that will achieve a height of 12" or higher (look at plant tags in the nursery). Spiky grasses or geraniums are popular and durable choices. Cannas are spectacular. My new favorite is to select a dark foliage such as coleus or croton.
• Filler plants grow "up" a bit as well, though they will not be as high as the Thriller (above). Filler plants may add foliage or flowers maybe even herbs or veggies. Popular floral Fillers include zinnias, petunias (nice light fragrance), marigolds, ageratum, dahlias, tuberous begonias, impatiens, etc.
 • Spillers are those lovely trailers and vines that bring additional lushness to your planter by contributing a “cup spilleth over” look. Again, check those plant tags in the nursery. Look for the word "trailing". Popular Spillers include ivy, vinca vines, and sweet potato. I also like to look for some flowering spillers which may include trailing petunias, verbena, alyssum, bacopa, lobelia and many others.
 Consider how fabulous a 12" high container will look with a 15" high center plant, surrounded by 6" pretty plants/flowers, and then 10" of dripping trailers. Now that's getting your money's worth out of a planter!
3 Layer Containers:
I also like to think about the planter itself as having three different layers. Go ahead and use any kind of container with a drainage hole. Once you have selected your container, and before adding any plants, create these layers starting from the bottom of the container:
• First: For your bottom "layer", partially block that drainage hole with a stone or piece of broken clay pottery (known as a shard, yeah, there's a name for that!). This prevents your soil from leaking out every time you water. See my video on my May 9, 2010 posting.
• Second: Above the drainage hole, allow some substrate for drainage and aeration. Many a container garden has failed due to over watering and/or root rot, both of which can be prevented with drainage and aeration. You want excess water to drain right out. You may use pebbles or other inorganic materials that will life the soil off the floor of the container and allow for aeration. Those roots need some oxygen in order to thrive.
• Third: Add potting soil up to 1 - 2" from the rim of container. Note that I typically lay down a sufficient layer of soil that will allow me to "place" the new plants (removed from nursery pots) directly onto that layer. Remember at this point to "tickle" the roots a bit to pull them away from the root ball which will encourage root growth out and down into the new soil. Once I have these plants arranged to my liking, I fill in around the plant with additional soil up to that 1-2” from rim. I do exert a bit of pressure to tap down and hold the plant in place. Not too much! Don't hurt the plant or compact the soil in this process. Remember also to keep the plant at the same soil level, in other words – don’t plant deeper or more shallow.
Soil Consideration:
Be mindful of the depth of your container and the size of the rootball. Yes, your plant(s) will develop roots and grow deeper as the season progress. That being said, I would not plant a 2" deep root ball into 12" of soil. I would recommend a container be 2 to 3 times the size of the rootball. If you find you have a large container that requires a significant amount of sail, it may be advisable to add in something that will take up space inside the container. You will save money by using less soil and your containers will weigh less as well See my video on how to take up that space using plastic water bottles:
#p/u/12/O9mkym_riik#p/u/6/15bvNUc5VTw
Use new potting soil every year. Every year? Well, the soil gets depleted and it tends to get compacted. I have, in the past, used soil for 2-3 years and did lots of fertilizing. Your choice. Potting soil comes in 32 quart sizes which is the most manageable for those of use with a few muscles and the ability to carry these up one or more flights of stairs to the balcony (or through the house to the enclosed backyard urban oasis).
I recommend that you specifically select potting soil (not topsoil or other options at the nursery). There are many potting soils out there and I've done very well with Miracle Grow potting soil.
3 Tools You Will Need:
I am keeping this simple because, yes, it is indeed quite simple. You will need a watering can or hose, scissors (pruners would be overkill in a small garden, unless you have trees that need pruning), and a small hand shovel (trowel) or a big ol’ spoon from the kitchen. Those tools can set you back a minimum of $10, so we are not talking about a big investment. Please buy that watering can in plastic and in a one or two gallon size. I do enough running back and forth to the kitchen tap each morning with a 2 gallon watering can, I cannot imagine how tedious this would be with a quart can. My experience with those wide mouth or sprinkle mouth watering cans is not that positive. My preference is small mouth which you can easily control and direct.
Also handy would be a broom for the dirt and spent flower petals that inevitably show up on your balcony, patio or deck floor. I use one of the empty nursery pots to scoop potting soil into my containers.
Additional options would be bug sprays and fertilizers, neither of which I'm worried about in this posting. You can go organic or chemical. Frankly, bug sprays scare me, so I'd advise that you go with the weakest solution of anything that works. Some organic soaps are very effective.
Final Bits for The Garden:
Okay, once you have your containers, you have them filled, plants are trimmed and watered -- what else could be considered?
Seating! Anything that is comfortable works in the garden. I prefer something I can leave outside so I went with an aluminum (looks like wrought iron) patio set. Not a fan of the plastic chairs! I believe you should consider whether you are leaving the furniture out all winter (I do) and also note whether your furniture will hold up to high winds. The aluminum and wrought iron pieces are not likely to move in high winds because they are heavy and because they have lots of ventilation and the winds move right through them. Those plastic chairs, whoo hoo, they can go flying!
Personally, I like a little table out there. Maybe a spot where you can grab a quick outdoor breakfast (who has time for breakfast anymore?). A table is also great for dining "al fresco" in the evenings. Yummy! Depending on your space, you may be looking for a 24 - 30" inch square or round table which is sometimes called a "bistro" size. My personal choice would not be the high bistro table and chairs since that would impair my view of the balcony flowers. That being said, you city-dwellers with fabulous view may way a nice high seat and table to see above the railings and drink in the urban night life.
Night lights are a way to extend your enjoyment of both the garden and your outside space well into the evening. Options include temporary lighting such as Xmas lighting tucked into/around your plants, candles (real flame or battery operated) in glass housing, or some of the lanterns available at camping/hardware stores. I found a BBQ grill light that was small and portable (operates on AAA batteries). I like the flexible gooseneck and I've used this light to provide indirect (courtesy) lighting. With courtesy lighting on the balcony, you can see well enough to walk around, yet have no light directly in your eyes. Think "romance". And yeah, that romantic light is just fine whether you are out there by yourself ("who loves you, baby?") or you are sitting out with the kids. Hey, let the kids have an evening where they decorate with glow-sticks. Remember creativity? It is all about fun in your garden folks. This is YOUR space.
You may think of adding a water feature to complete that zen luxury feeling. Depending on the unique features of your own balcony, patio, terrace or deck, you could add a tabletop fountain ($30-120) or make one out of your own waterproof container using about $30 worth of pump, tubing and a spouter.


